Landscape Products
Sedona Stone
![]()
OVERVIEW
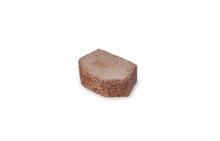
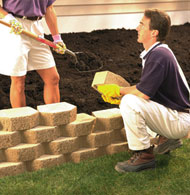
With a natural appearance and earthy color blends, Keystone Sedona Stone will blend with any landscape. Lightweight and easy to handle, Sedona Stone is perfect for your do-it-yourself project. Its secure, interlocking design makes installation as easy as 1-2-3! No special tools are required. Also known as Lodgestone in certain areas of the country, Keystone Sedona Stone will make your next retaining wall project easy.
 |
 |
Keystone Sedona Stone is also known as Lodgestone in certain areas of the country. |
SPECIFICATIONS
| specifications | tri-plane |
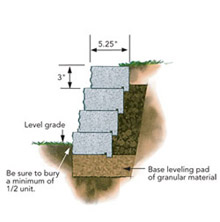
| height | 3" |
| width | 8" |
| depth | 5.25" |
| weight | 8lbs |
Product size, weight, color and product availability varies by location. Please contact your local manufacturer for up-to-date product information.
 |
 |
ESTIMATING
Use this guide for estimating the number of Keystone Sedona StoneT units required.
WALL HEIGHT |
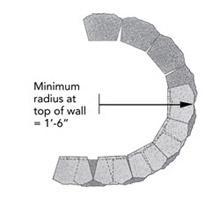
WALL LENGTH (measured at wall face including curves) | |||||
| 5' | 10' | 15' | 20' | 25' | 30' | |
| 3" (1 course) | 8 | 15 | 23 | 30 | 38 | 45 |
| 6" (2 courses) | 16 | 30 | 46 | 60 | 76 | 90 |
| 9" (3 courses) | 24 | 45 | 69 | 90 | 114 | 135 |
| 12" (4 courses) | 32 | 60 | 92 | 120 | 152 | 180 |
Please Note:
Maximum wall height not to exceed 12". This chart is based on site conditions which include a level grade, granular soil and no surcharge. Contact Keystone Retaining Wall Systems for design options on wall heights exceeding 12".
INSTALLATION
 |
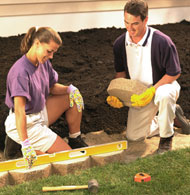 |
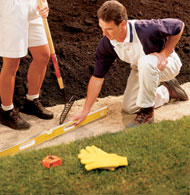
| STEP 1 | Prepare the site. | STEP 2 | Set the base course. |
| Start by digging a shallow trench 4" deep by 12" wide. Cut through and remove any sod, roots or large rocks. For organic loam soils, dig 4" deeper and add a leveling pad of sand or gravel. Compact and level the soil to receive the first course of Keystone Sedona StoneT. | Place and level the first Keystone Sedona StoneT unit. Level each additional unit on the base course as you place it, making sure that the outside edges touch. If your wall contains both straight and curved areas, start with a straight area and build into the curves. Complete the base course before proceeding to the second course. |
 |
 Remove Edges To remove outside lugs or edges of the retaining lip, hold the unit securely or place it at an angle on the ground. Strike the lug firmly with a hammer. Cutting the units may also be necessary to keep them on bond. Always wear safety glasses to protect the eyes from chips. |
| STEP 3 | Stack and fill. | |
| Starting with straight areas first, begin placing the second course. Center each Keystone Sedona StoneT unit on the seams of the course below in a running bond pattern as shown. Now proceed to the next layer, backfilling as you go. For drainage behind the wall, clean gravel or crushed stone is recommended. |
|